How to Dye Seashells for a Summer Sensory Bin
Sensory bins are quite possibly the perfect activity for toddlers and preschoolers! Throughout my years as a preschool educator I have crammed soooooo much learning into one little (or big) sensory box. It helps to have a wealth of different ideas in your back pocket so you can keep learning interesting and varied for preschoolers. Add these dyed seashells to a beach sensory bin for summer and let the learning continue!

Recommended Grade Level:
Dyed Seashells in a Summer Sensory Bin
Dying seashells transforms into sensory learning when placed into a bin with sand and other “beachy” items. If you’ve never dyed seashells before, think Easter eggs minus the eggs! All you need is some food coloring and vinegar to create a rainbow of appealing seashells. While the shells are drying, check out our Super Fun Beach Learning Activities for Kids for more engaging summer learning!
Dying the seashells is an opportunity for preschoolers to learn colors, color mixing, color matching, and any other fun color activities you can think of. Young kids will delight in burying and finding colored seashells in the sand. If you’re looking for more opportunities to teach colors to preschoolers, our Magic Rainbow Science Experiment is a perfect outdoor activity on a beautiful summer day.
Perhaps your beach-goers are a little older and ready to tackle reading! If so, our Beach Theme CVC Word Mats really spice up summer literacy instruction.
Materials You Will Need for Dyed Seashells:
- White seashells
- Several containers for soaking the shells (1 for each color you plan to use) Mason jars, glass tumblers, or plastic containers work well.
- Food coloring
- Vinegar
- Water
- Spoons
- Paper plates
- Paper towel

Step-by-Step Instructions for Dying Seashells for a Preschool Sensory Bin
Ingredients (for EACH color):
- 1/3 cup water
- 2-3 tablespoons vinegar
- 20-25 drops food coloring

Step One:
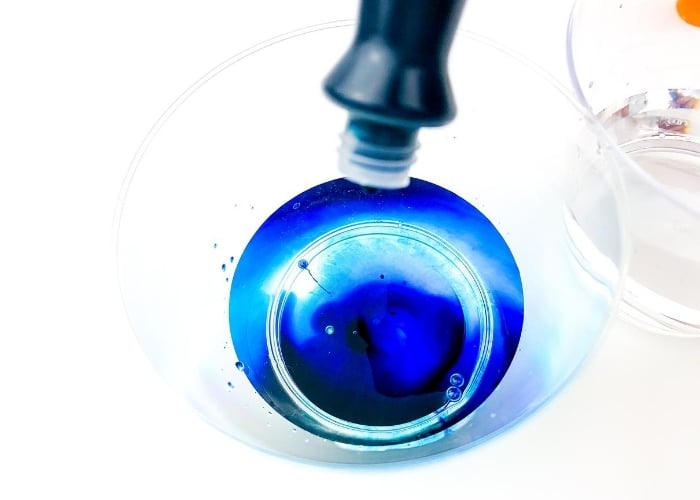
Prep your area by covering the work surface to avoid stains. Mix vinegar, water, and food coloring for each color desired.
Tip: Mix ahead of time OR make this part of the lesson by measuring and mixing with children.

Step Two:
Place seashells into colored containers. Make sure they are fully submerged into the mixture. Allow the shells to sit for 5 minutes.

Step Three:
Carefully lift the shells out to check for color saturation. For darker colors, add more food coloring and vinegar as necessary. For lighter colors, use less food coloring and vinegar.

Step Four:
When the desired color is reached, use the spoon to place the shells on a paper towel lined paper plate to fully dry.

Step Five:
Add the shells to your sand bin and enjoy!
Tip: If you’d rather not use sand, you can replace with other sensory materials.

Frequently Asked Questions
These are frequently asked questions about dying seashells:
Can I use apple cider vinegar?
White vinegar is recommended because it’s clear and won’t alter the dye color. Other vinegars might change the dye’s hue.
Does the dye stain surfaces?
Yes, make sure to protect surfaces. I use like to use a tarp, newspaper, butcher paper, or an old table cloth.
What temperature should the water be?
The hotter the better! While the recipe doesn’t call for boiling or hot water, warm water expedites the chemical process and helps the shells absorb the dye mixture better.
Why do I need to use vinegar in the mixture?
The vinegar is a key component of the dye, helping it adhere to the surface of the shells.
How do I get dye off our hands?
Oddly enough, soak stained hands in a 50/50 mixture of vinegar and water, then wash with soap and water to remove dye stains from hands.
Yay! You did it. What Now?
Enjoy your dyed seashells any way you want to! If you’re lucky enough to live near a beach, head out with those colored shells to explore in an endless sand bin. Before you go, print off our Beach Scavenger Hunt to keep curious kids busy at the beach!
You can also include other items that fit into a beach/ocean sensory theme like sea life and plants, water, rocks/or coral.
Ways to Adapt Your Summer Sensory Bin
It’s possible summer is the BEST time for sensory exploration because you can let nature do all the prep work! Take advantage of sensory opportunities in the grass, sandbox, leaves and trees, puddles, wind and whatever else you come across in your outdoor adventures. Check out our Summer Theme Preschool Sensory Bin activity for more inspiration.
Other great sensory bin fillers include rice (check out our rice sensory bins for more inspiration!), rocks, cotton balls, pasta (cooked and uncooked), water, bubbles, sticks, grass, leaves, or shredded paper. There really is no limit to what materials kids can explore.
Adult supervision required, of course, especially for toddlers who primarily explore with their mouths!
What are the benefits of dying seashells with kids?
1. Sensory Exploration
- Engages touch, sight, and sometimes smell (vinegar!), providing a rich sensory experience.
2. Creativity Boost
- Encourages artistic expression as children choose colors and create unique designs.
3. Fine Motor Skills
- Improves hand-eye coordination and dexterity through handling and dyeing the seashells.
4. Color Recognition
- Helps children learn and identify different colors and understand color mixing.
5. Science Introduction
- Introduces basic science concepts like cause and effect, and the reaction between vinegar and food coloring.
Benefits of a Seashell Sensory Bin
Sensory bin activities for preschoolers are a must-have component in every preschool lesson plan. It is a natural way to allow young kids to explore and learn about the world around them by manipulating objects.
Summer sensory bin activities are especially exciting because you can even take the learning outside!
Here are some benefits you can expect by offering the seashell sensory bin to your children:
- Fine motor skills develop and improve as kids grasp, pinch, grab, slide, push, hide, and MORE with their little hands and fingers.
- Language skills develop and improve as they are introduced to new theme-related vocabulary.
- Sensory experiences allow kids to explore cause and effect.
- Problem solving and scientific thinking skills improve.
- Children learn to work together, share, and cooperate.
I hope your children have so much fun exploring the dyed seashells sensory bin all summer long! Let us know what you think!
Try These Coordinating Ocean Activities Too
More Ocean Sensory Bin Ideas
Check out these ocean theme printables
- Ocean Spin and Stamp Alphabet
- Ocean Counting Grid
- Ocean Animal Pattern Block Mats
- Printable Ocean Animal Valentine Cards
More Summer Activities for Kids
- Hydro-dipping Sand Dollars Process Art
- Painting with Oranges
- Unicorn Ice Painting Process Art for Summer
Search All Activities
Looking for more? Find exactly what you need here:


