Dollar Store Fine Motor Pumpkin Craft for Kids
I really enjoy crafting with my kids. I know some people get anxiety at the thought of kids with craft supplies, but it really doesn’t bother me. I like watching them use creativity. This Dollar Store Fine Motor Pumpkin Craft for Kids is a super cute pumpkin fine motor activity. Use it as a fall activity for preschoolers to build muscles and express themselves. I like it because it’s not your average pumpkin craft for preschoolers-no pumpkin shaped construction paper in sight! I also love that we got all the supplies at our local dollar store. This fall craft for preschool will not break the bank. Have fun!

Recommended Grade Level:
Preschool Pumpkin Activities
PUMPKIN CRAFT IDEAS
PUMPKIN ART IN PRESCHOOL IS PRETTY COMMON AS WE CELEBRATE FALL. THIS FALL PRESCHOOL ACTIVITY FOCUSES SPECIFICALLY ON DEVELOPING FINE MOTOR MUSCLES.
Have you heard of the famous foam pumpkins from Dollar Tree? I have seen a handful of ways others are transforming them and I just had to do it, too! Transform a trio of Dollar Store neon orange foam pumpkins into colorful and whimsical Fall decorations with some simple supplies! This quick and easy craft goes together in under 30 minutes. 30 MINUTES!
All while working on fine motor skills.
This spin on pumpkin preschool art involves several steps, so you might want to plan ahead. First, we painted our pumpkins white. While this is not a necessary step, the white pumpkins add to the whimsical vibe and help the colors of the add-ons pop.
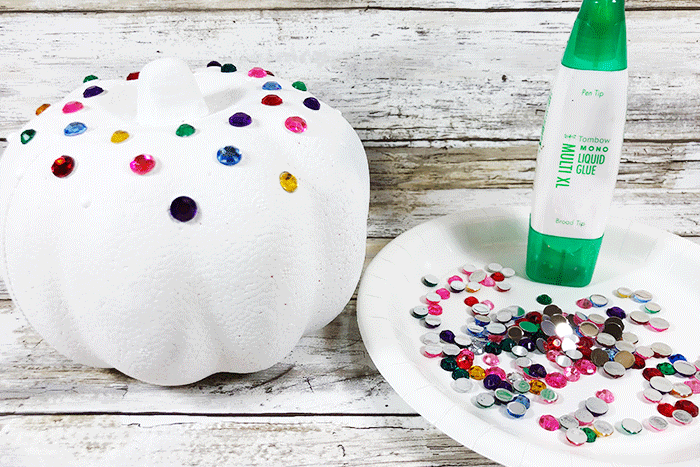
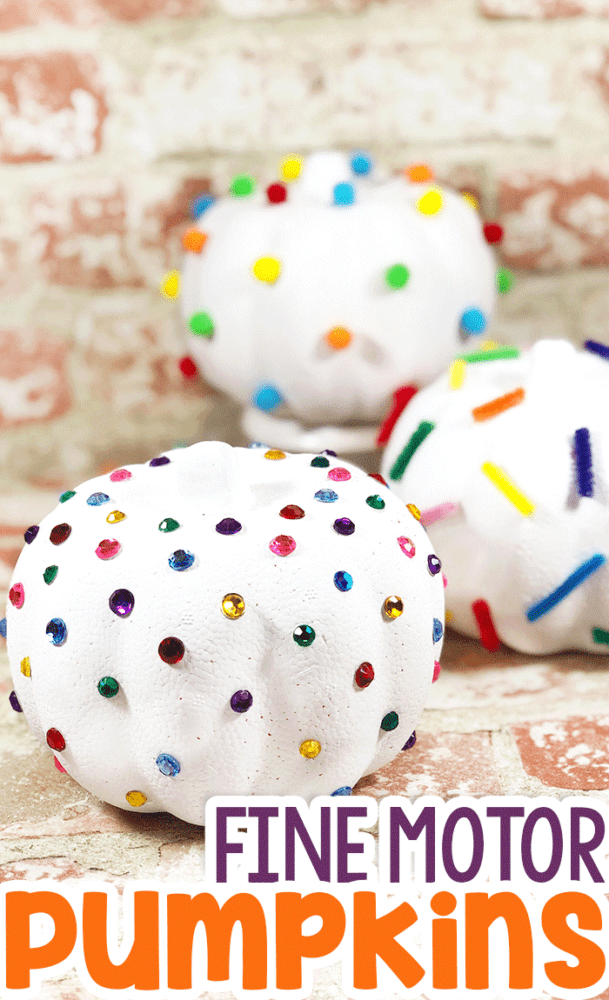
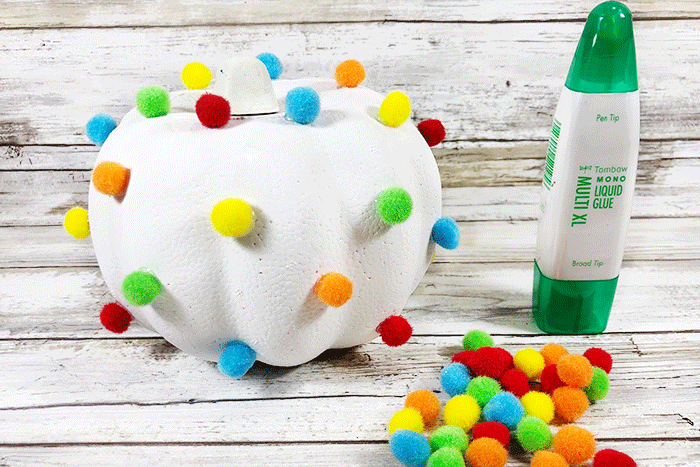
Once the paint is dry, kids can express creativity by adding rhinestones, chenille stem pieces, and pom poms in whatever designs they like.
This easy pumpkin craft can be a great time to work on oral language also! Consider asking questions:
- What colors do you want to use on your pumpkin? Why did you choose those colors?
- Can you show me the different shapes you’re using to decorate your pumpkin? How many shapes can you find?
- How are you arranging the rhinestones, pom poms, and chenille stems on your pumpkin? Is there a pattern you’re following?
- What do you think your pumpkin will look like when it’s finished? Can you describe it to me?
What Can Preschoolers Learn While Making an Easy Pumpkin Craft for Kids?
PRESCHOOL FALL ACTIVITIES FOR KIDS
THERE ARE SO MANY FUN FALL CRAFT IDEAS TO CHOOSE FROM! THIS ONE CHECKS BOXES NEXT TO FINE MOTOR DEVELOPMENT, SENSORY PLAY, AND CREATIVITY!
Children learn so much when we allow them to explore different art mediums. Painting, designing, cutting, and gluing are skills that require practice.
The perfect fine motor creative learning project to complete with the kiddos! Work on measuring, sorting and counting activities as you craft.
You can show your children what you plan to do and what you are imagining. Then you can let them explore with their own creativity! It is all in the process, not in the outcome!
- Fine Motor
- Creativity
- Color Recognition
- Spatial Awareness
Why Is It Important For Kids To Make Fall Arts and Crafts?
Simple crafts are great hands-on activities that help kids learn a variety of other skills. Also, they just like to get down and dirty with cool looking, sparkly craft supplies and glue!
Fine Motor: Painting and gluing embellishments require precise hand movements, which help strengthen the children’s fine motor skills. They improve their hand-eye coordination and dexterity as they manipulate brushes and handle small embellishments.
Creativity: Art projects like decorating a 3D pumpkin encourage children to express their unique ideas and creativity. They can choose colors, shapes, and patterns, allowing them to explore and experiment with different artistic elements.
Color Recognition: Through selecting and mixing colors for painting and embellishing, preschoolers develop their color recognition skills. They learn to identify and name various colors, enhancing their understanding of basic color concepts.
Spatial Awareness: Working with design requires understanding spatial relationships. Kids need to consider where to place the embellishments on the pumpkin’s surface, helping them develop spatial awareness and geometry concepts like symmetry and arrangement.
How to Make the Fall Pumpkin Fine Motor Craft
Supplies:
You don’t need a lot of craft supplies and it is all inexpensive because it’s mostly from the dollar store!
- Dollar Store Foam Pumpkins – Three
- Dollar Store Pom Poms
- Dollar Store Rhinestones
- Dollar Store Chenille Stems
- Acrylic Craft Paint – White
- Liquid Glue
- Paintbrush
- Scissors (these are for cutting the pipe cleaners, so I suggest an old pair of scissors since they will be damaged slightly by the wire. We keep a set specifically for projects like this.)
I like to organize the embellishments on paper plates for the pumpkins.

Step One:
The first thing I did was add a basecoat to the pumpkins with white craft paint then let dry.
Apply a second and third coat, if necessary, letting each coat dry completely. I like the pumpkins to be completely white, which is why I used three coats.

Step Two:
For the “sprinkle” pumpkin, cut 1” lengths from chenille stems. Apply lines of liquid glue on pumpkin surface and place chenille stems pieces on in a random fashion, filling in all available spaces.

Step Three:
For “polka dot” pumpkin, apply dots of liquid glue on pumpkin surface and place pom poms on in a random fashion, filling in all available spaces.
Step Four:
For “jeweled” pumpkin, apply dots of liquid glue on pumpkin surface and place rhinestones on in a random fashion, filling in all available spaces.

Ways to Extend the Activity
More Fall Shapes
You could take the same concept and appy it to an apple craft, acorn craft, or pumpkin pie, depending on what foam shapes you can find at your local dollar store.
Rubber Bands
Get funky by wrapping a couple of rubber bands around the pumpkin before painting. When you pull them off, you’ll have orange stripes to add to the design.
Jack-o-Lantern
Turn your pumpkins into jack-o-lanterns by adding shapes to create eyes, nose, mouth with the stems, rhinestones, and pom poms.
Try These Pumpkin Crafts Next
More Fall Sensory Activities
Check out some more fall art ideas for preschool
- Fall Leaf Art Salt Painting
- Fall Tree Salt Painting
- Fall Tree Toilet Paper Roll Craft
- 25+ Turkey Crafts
Search All Activities
Looking for more? Find exactly what you need here:


