Fun, DIY Tapestry Weaving for Tweens
One thing that is not lacking in our house is the desire to craft and be creative. My girls have always loved picking up random craft supplies and seeing what they can create. It warms my mama heart to see them make something they are so proud of. (And I always love art projects that don’t find their way into the trash a few days after they are created!) This Tapestry Weaving project for tweens is exactly one of those projects!

Recommended Grade Level:
This weaving project is a great one for pre-teens and teens, but you can easily modify the project for children as young as preschool.
Fine Motor Craft for Tweens
We love crafts of all kinds, but I am particularly interested in crafts that provide fine motor development without feeling like work.
My 12 year old has always struggled with handwriting. She has a 504 to limit the amount of handwriting notes she is required to do during the day because writing can make her hands hurt and she has a significant delay in handwriting skills.
However, she also, like many pre-teens, has a fragile self-esteem. And saying something like “You need Occupational Therapy because you have bad handwriting.” is sure to upset her and ensure that she doesn’t want to go.
Instead, we have been incorporating fine motor crafts and activities at home that work on fine motor skills while still being FUN! And I don’t even have to tell her that I have an ulterior motive…lol!
What supplies are needed for a homemade loom?
- 4 small sticks
- Superglue
What supplies are needed to create the tapestry?
- Yarn in various colors and textures
- Tapestry Needle
What if I Have Never Done Weaving with Tweens Before?
If you have never done a weaving project with tweens before, purchasing the individual supplies can be overwhelming.
Instead of buying the yarn and the needles and gathering the supplies for the loom, you can use a weaving kit like this simple one from Melissa & Doug. It’s perfect for kids and you don’t have to worry about getting lost in the aisles of Hobby Lobby or Michaels searching for the supplies.
Just grab the kit and the yarn of your choice to get started on your weaving project.
Time needed: 1 hour.
Supplies Needed:
4 small sticks
Superglue
Yarn in various colors and textures
Tools:
Tapestry Needle
Create a beautiful woven tapestry for your wall with just a few sticks and some yarn. Add pom poms or other decorations for added texture and design fun!
- Create your own weaving loom
Select four small sticks. Either 4 of the same size to form a square or or 2 each of matching sizes to form a rectangle and place them together with one inch sticking out on the sides of your homemade loom.
Use super glue on the corners of the weaving loom where the sticks overlap.
- Create the base layer of your DIY loom
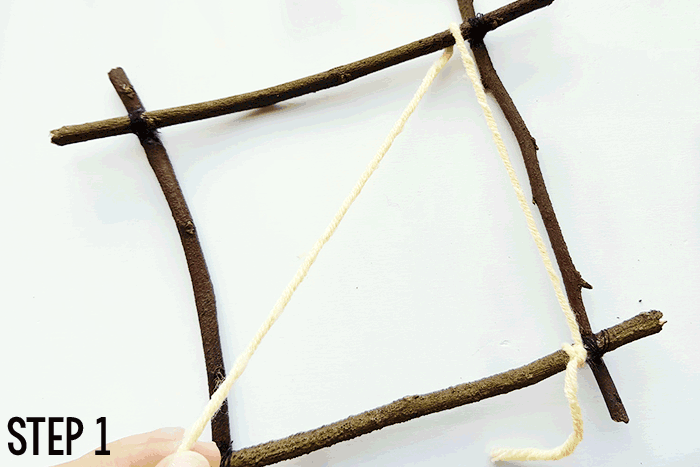
Choose your base yarn and tie a knot on one corner.
Pull the yarn up to the opposite side and wrap the yarn around the stick 2 or 3 times to secure it.
- Complete the base of your loom
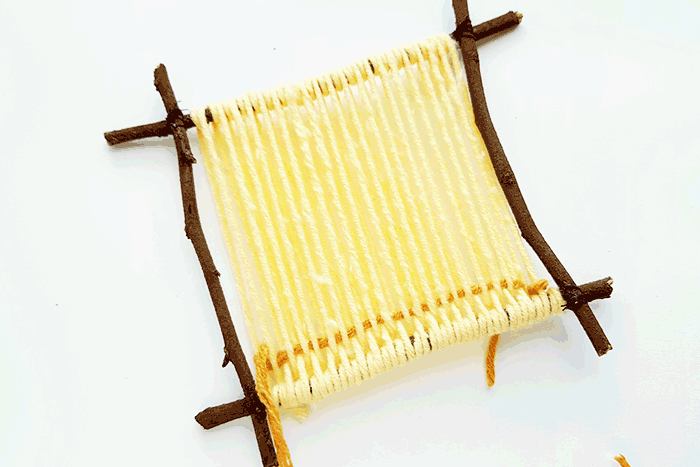
Continue wrapping the yarn from side to side on your loom until the loom is filled. Once the loom is filled, tie a knot around the final stick to hold the yarn in place. Then trim the end of the yarn.

- Start Weaving
Choose a yarn and prepare a tapestry needle with it (there are plastic needles available if you are worried about a child poking herself with a traditional tapestry needle). Keeping an inch of the open end of the yarn at the back side, simply pull the needle over and under the base strands.
After the weaving reaches the side of the base, start to weave over and under backwards. Bring the needle back to its initial side. Weave as many layers of over and under weaving as you want.
- Create a braided look
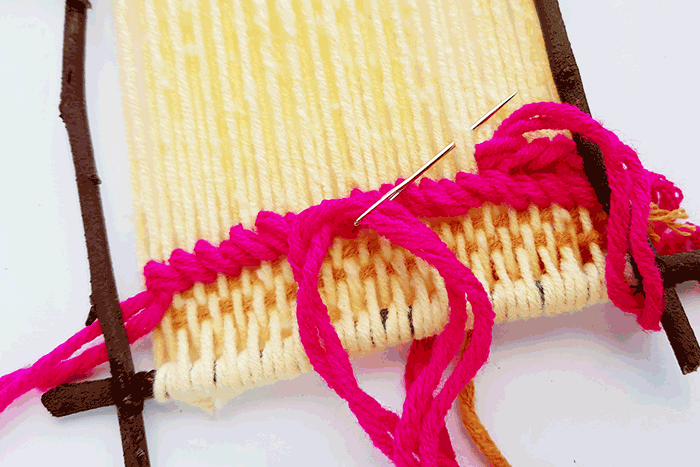
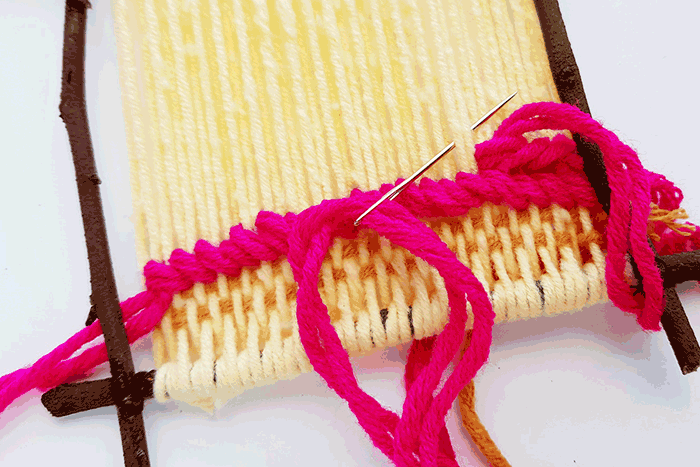
Prepare double yarn strands with a tapestry needle. Draw the needle from the back side to the front of the warp, keeping about an inch of the strands at the back side. Pass the next 1 warp string from the left and draw the needle through the second string from right to left.

- Continue the braided look
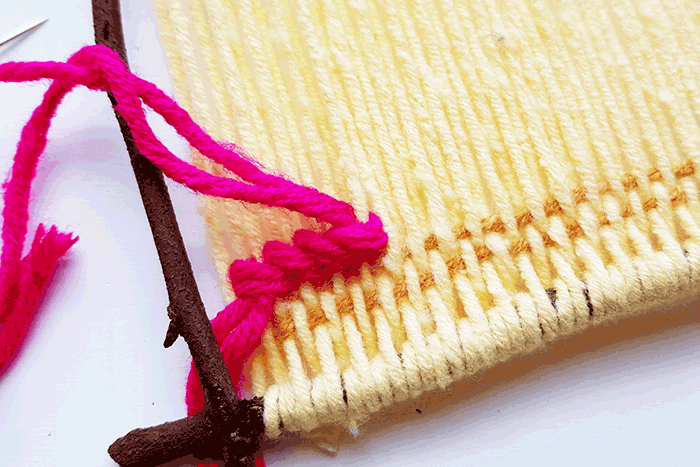
Continue to weave by following the previous instructions (skipping every next string and drawing the needle through the second next from right to left. This is called Soumak technique.
Continue the Soumak weaving until reaching the other side.
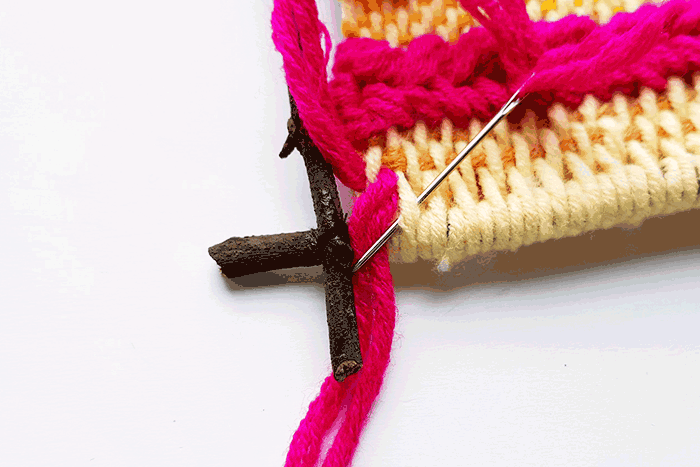
After reaching the other side; for the next row, continue the same technique but from opposite direction. This will form a braid pattern.
After completing the Soumak weaving, draw the remaining strands to the back side of the frame and tie a knot before cutting the extra yarn strands. Select different colored yarn and continue with the weaving.
- Continue Weaving
Mix and match different colored yarns to complete the tapestry weaving.

- Create Your Tassels
Prepare a bunch of yarn strands for the tassel. We used 2 yarn strands (6 inches long) for each tassel. Insert both strands into a tapestry needle.
We started to add the tassels from the left side. Draw the needle under the first string from the left.
Draw the strands halfway through and then stop. Now hold the strands and draw them under 2nd string from the right.
Pull the open ends of the strands all the way through; which will form a loop with the base strand and secure the tassel.
- Finish Your Tassels
Similarly, attach the rest of the tassels on the bottom side of the tapestry weaving frame.
Add some felt flowers or pompoms to decorate the woven piece.
- Prepare Your Tapestry for Display
Simply attach a hanging mechanism on the back side and hang it on a wall! No need to remove the tapestry from the stick loom.

Creating a tapestry can be a great way to work on fine motor skills with older kids who are struggling with pencil grasp or have poor handwriting skills without pushing extra ‘work’ on them.
Tweens often struggle with fine motor skills, but they can be resistant to occupational therapy thinking that learning handwriting skills is for ‘babies’.
Providing crafts and other projects is a great way to help them without damaging their already wavering self-esteem.
Whether you are looking to address fine motor skills or you are just looking for a fun EASY craft for tweens, this DIY loom and tapestry weaving project is perfect!
Do you love this activity?
Pin it for later!

Try More Ideas for Older Kids
- 12+ Exciting Outdoor Activities for Tweens
- How to Make a Fun Wall Garland for Your Tween
- 15+ Colorful Rainbow Crafts
Crafts for Kids
Check out more craft ideas here
- 30+ Toilet Paper Roll Crafts for Kids
- Fine Motor Stitching Winter Snowflake Craft
- Space Theme Bouncy Ball Process Art
Search All Activities
Looking for more? Find exactly what you need here:











That’s really a great idea for kids or adults, too. Beautiful idea and I especially love the twigs!